Examinations
anamnese
You come to the ophthalmologist with a specific complaint. First, the history will be taken. The nurse asks what complaint you have, what symptoms, how long the complaints have existed and what the possible cause could be. Sometimes it is necessary to take an extensive history, especially when other causes of the disease may exist (diabetes mellitus, pituitary tumor, congenital abnormalities, etc.)
There is also a hereditary factor in some eye conditions. The nurse will therefore ask you whether your parents have glaucoma or a retinal disease (e.g. AMD Age-related Macular Degeneration). Some medications can also influence whether or not an eye condition develops or accelerates.
Therefore, always take the list of your medications with you!
Autorefraction
You will then be placed in front of 2 instruments: the autorefractor and the tonometer.
The autorefractor is a machine that measures your eyes' ability to focus and provides an estimate of your strength. You are asked to look at an image in the machine (for example of a balloon on a long straight road) through two lenses, and focus your eyes on the image. The machine makes it appear as if the balloon is moving closer and further away. While this is happening, the machine calculates an estimate of your prescription based on how well your eyes focus on the image.

Tonometry
The eye pressure is the pressure exerted by the contents of the eyeball on the wall of the eyeball and therefore gives it its tension. Tonometry measures intraocular pressure.
Normal eye pressure ranges from 11 to 21 mmHG with an average of 16 mmHG. Statistically speaking, above 21 mmHG there is an increased eye pressure. This pressure is not to be confused with blood pressure. Only an ophthalmologist can determine the eye pressure! That is why it is important to consult an ophthalmologist once a year from the age of 50. Increased eye pressure can lead to the development of glaucoma
The eye pressure can be determined in various ways: using the puff tonometer or by the ophthalmologist himself.
Puff tonometer
During the preliminary examinations, the nurse will use the puff tonometer. A small amount of air ('puff') is blown against the cornea and the device measures the eye pressure based on the resistance of the cornea (the higher the resistance, the higher the eye pressure). One feels this but it does not hurt.
Applanation tonometer
At the ophthalmologist, the eye pressure is usually determined with an applanation tonometer. This method is slightly more accurate than the puff tonometer. First, an anesthetic drop is given. This droplet usually also contains a yellow dye (fluorescein). A small measuring instrument attached to the slit lamp is pressed very gently against the cornea. Since the surface of the eye is anesthetized, this is not felt. At the same time, a blue light is shone into the eye, causing the dye to glow brightly ('fluoresce') and the ophthalmologist can read the eye pressure through the slit lamp microscope. The principle of this method is based on the deformability of the cornea. The more difficult the cornea is to deform under superficial pressure ('applanation'), the higher the intraocular pressure in the eye. This can be compared to a bicycle tire or a ball that has been inflated with air. The easier the tire or ball can be pressed with the finger, the lower the pressure inside the tire or ball. The deformability of the cornea is measured with the applanation tonometer and is related to the eye pressure.
OCT examination
The ophthalmologist decides to have an eye scan: an Optical Coherence Tomography (OCT). This scan creates images (in high resolution) of structures in the eye, the optic nerve and the retina. The yellow spot (macula) is part of the retina. This is done, among other things, in the context of detection and follow-up of Age-related Macular Degeneration (AMD), Glaucoma and Diabetic Retinopathy.
During the examination you will sit in front of the scanning machine. Your chin rests in a chin rest and your forehead rests against a band. You look at a marker in the device. You fixate your gaze on this point during the examination.
The device then sends an infrared light beam, through the pupil, into the eye onto the retina. This light is not dangerous. The various structures of the retina then reflect this light via the pupil, back to the scanning device. This creates an image of the retina in the device. The eye scan takes a few minutes.

Fluoro-angiography
Fluorescence angiography is an examination aimed at detecting abnormalities in the back part of the eye, such as abnormalities and damage to the retina or the retinal pigment epithelium, or the formation of abnormal new blood vessels in and under the retina or abnormalities in the choroid.
The research is also carried out to monitor the course of a disease or to assess the effect of a treatment. Your ophthalmologist has discussed with you the reason why you need to have the photos taken.
At the start of the examination, the nurse will inject a water-soluble dye (fluorescein) into a vein in your arm. The dye spreads through the entire body via the large body vein and also goes to the vessels of the eye. The substance fluorescein can sometimes cause nausea immediately after injection. This usually goes away quickly. The dye also spreads quite quickly through the blood vessels of the eye after injection.
At that moment, several pictures of the retina are taken. In this way the location and severity of the eye condition are visualized.
Pupil dilating drops are administered before the examination to prevent pupillary reactions during the examination. The examination takes about fifteen minutes and is generally moderately stressful. Some people are difficult to prick and it can be equally unpleasant. The examination itself is not painful, but sometimes people feel nauseous from the fluorescein. The flashes of light in the eye can also be annoying. Let us know if you are ALLERGIC to certain substances!
You may have a yellowish skin color for up to 24 hours after the examination due to the fluorescein and the urine may be orange-yellow in color.
Although fluorescein is not a dangerous substance, it is recommended to drink plenty of water afterwards to remove the dye from the body as quickly as possible.

Visual field examination
Abnormalities of the eyes (e.g. glaucoma, retinal disorders) or of the central nervous system can cause parts of the visual field to disappear; one then speaks of visual field defects or scotomas.
The field of view can be determined in many ways. The method depends on the abnormalities expected and the part of the visual field to be examined
A visual field examination is not an easy examination, because it requires the necessary concentration. You sit in front of a device, with one eye covered, looking into a kind of hemisphere. You look straight ahead at a fixed point. As soon as you see the light, you have to press a button. The device then records where you observed the light and at what light intensity. In this way, your entire field of vision is examined in each eye. The examination is painless. The computer also tests whether you look straight ahead at the fixed point during the examination. The nurse also checks whether the examination is proceeding correctly. The test takes approximately 10 minutes per eye.

Atropine drop study in children
Your child has been examined by the ophthalmologist and a glasses measurement has been agreed. For a reliable glasses measurement, it is necessary to first drip the eyes with atropine before this measurement. This prevents the ability to focus close and your child can no longer influence the glasses measurement by accommodating.
If the atropine eye drops have been properly absorbed, the pupils are usually very large. As a result, your child may be bothered by bright (sun)light. Sunglasses or a hat can be a good solution for this. The light sensitivity disappears on its own, but in some cases it can take up to two weeks.
When should you start instilling?
- 1 hour before the appointment time, place 1 drop in each eye.
- After 15 minutes, place 1 drop in each eye again
- After another 15 minutes, another drop in each eye
- Afterwards you will come by appointment
To instill correctly, I refer you to the website www.oogstromen.nl or watch the video below
Preliminary investigations for cataract surgery
In consultation with your ophthalmologist, you decide to undergo eye surgery to treat cataracts.
The following preliminary examinations will take place a few weeks before the procedure:
- a complete ophthalmological examination by the ophthalmologist
- an OCT
- a visual field examination
- a lens measurement
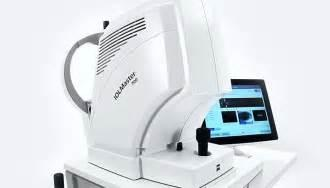
Eye lens measurement
With cataracts, the natural lens in the eye is cloudy. During cataract surgery, the cloudy lens is replaced by an implant lens. To calculate the power of the lens, a lens measurement must first be taken before the operation. This lens measurement is also called oculometry.
The optimal power of the implant lens is calculated based on measurements of the curvature of the cornea (the deflection of the front of the eye) and the axial length of the eye (the length of the eye).
There are 2 methods by which we can do this lens measurement:
- The first and most commonly used method uses laser light. You sit behind a device and we take the measurement using the laser light. This examination is painless and takes about 10 minutes. If the lens is too cloudy and this method cannot be used, we use method 2.
- With the second method we use ultrasound technology. You will lie back in a chair and a drop of anesthetic will be placed in the eye to be examined. A small plastic tube is then placed on your eye filled with gel and water. Sound waves are sent through this tube and we can measure the length of the eye using this ultrasound technique.
Once the measurements are known, the computer calculates the power of the implant lens that will be used during the operation.